
Create/move/resize/convert/copy and disk partitions recovery software
Size: 73.72 MB
About MiniTool Partition Wizard
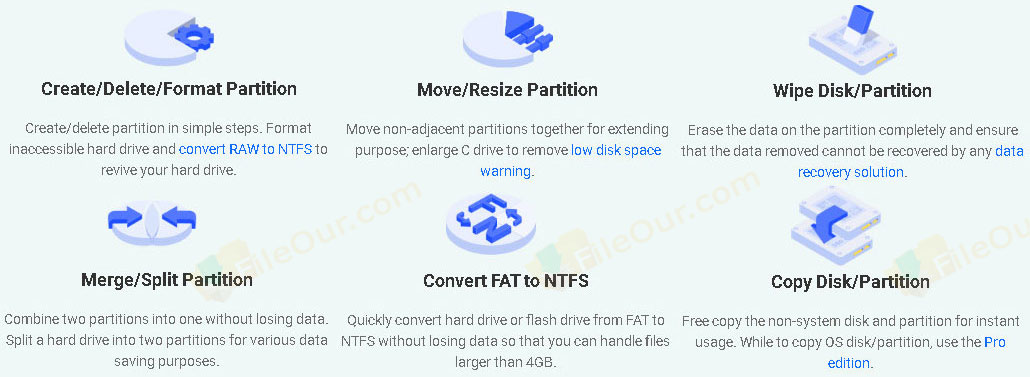
MiniTool Partition Wizard is an all-in-one partition management software. You can create/ delete/ resize/ merge/ split/ format/ wipe/ hide partitions to configure disk storage space in Windows. It can even recover damaged or lost partitions or all their data.
Modern hard drives have many gigabytes or even terabytes of space. It is a good idea to separate system files from other documents. If creating a partition with the operating system already installed may become tricky. But MiniTool Partition Wizard Free Edition is a free tool that solves this issue. Free Partition Manager will allow you to perform complex partition operations with ease.
It supports basic, dynamic disks, Linux volumes (Ext2/3) and even disk arrays (RAID).
Features
Extend a small partition to save more data or shrink a large partition to divide some free space. Also, help move the partition location.
Merge partition: Merge two adjacent NTFS partitions into a bigger one without damaging data in either partition.
Format partition: Format partition to FAT, exFAT, NTFS, Ext2/3/4 and Linux Swap to use the drive on different platforms. It also supports disk arrays (RAID).
Convert FAT32 to NTFS: Convert FAT32 to NTFS without data loss when you need to save individual files larger than 4GB to a FAT32 drive.
Set Partition Primary/Logical: Set partition primary to install an operating system and set partition logical to create more partitions on MBR disk.
SSD 4K Alignment: Make sure all partitions on SSD are correctly aligned to speed up the entire SSD and optimize PC performance.
Partition Resizer: Firstly, MiniTool partition software could solve it. Secondly, Organize your hard drive and gain more space in your existing partitions to maximize the usage of hard disk space. Thirdly, No matter it is basic or dynamic, GPT or MBR, a single disk or Raid disk.
Advanced Disk Partition Management: MiniTool Partition Manager helps you to create, delete, merge and split partitions. It also helps you to perform a variety of other partitioning operations.
Disk Clone/ Migrate: Clone or Migrate the disk to a replacement HDD. For instance, no need to spend hours reinstalling your old disk’s operating system and applications. However, disk cloning returns you to action on the new disk in just minutes.
Disk/Partition Converter: As your requirements change, you can quickly convert disks or partition between basic and dynamic disks, MBR and GPT disks, NTFS, and FAT32 Partition without data loss in just moments.
Supported File Systems
- FAT12/16/32
- NTFS
- Ext2/3/4
- exFAT
Supported Storage Devices
- Support UEFI/EFI boot.
- Support MBR disk and GPT disk.
- All storage devices recognized by Windows, such as RAID, etc.
- Traditional hard disk drives, solid-state drives (SSD), SSHD, etc.
- External hard drives, USB drives, SD cards, and other removable media.
Minimum System Requirements
- Processor: 1GHz Intel/AMD processor or above
- RAM: 512MB RAM
- Free Hard Disk: 200MB space for installation
- Graphics Card: Super VGA (800×600) resolution. 16-bit graphics card or higher
How to Install MiniTool Partition Wizard?
- Double-click on the installer
- Select the language to use during the installation and click
- Read the following license information and check ‘I accept the agreement’. Click
- Select destination location where you want to install it and click
- Leave everything at default and click
- Here uncheck ‘Participate in the Customer Experience Improvement Program’. Click
- Setup is now ready to install, so click
- Finally, click to launch the software
Top Interface
| Data Backup | Data Recovery | Partition Recovery | Disk Benchmark | Space Analyzer |
|---|---|---|---|---|
| This is not a function button. Just hotlinking for another product information. First, a sponsor button has been added which I find disgusting. | Secondly, a Data Recovery wizard has been added. It’s fine. Do you want to scan and recover deleted/lost or damaged documents, images, audio, videos and email? No problem! It can recover all. | MiniTool Partition Wizard recovers your partition which has already been damaged due to Windows update, accidental deletion, physical damage, virus attack. | It measures the performance of your hard disk drive. | It analyses disk space usage. See the result of how much space a file has used in the desired disk. I don’t find this option very useful. |
Data Recovery
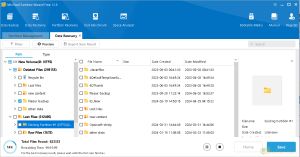
Scan FAT 12, FAT 16/32, exFAT, NTFS and HFS+ file systems to recover lost media.
- Double-click on the location you want to recover data from. Click on to start recovery.
- If a scan is completed, Here will show the data that can be recovered. You can preview it. Finally. select the desired file and click on .
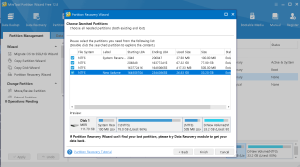
Partition Recovery Wizard
1) Click on
2) Choose a disk you want to recover
3) Change the scanning range for the specific disk from the following three ranges.
- Scanning Range: Full Disk (Scanning entire disk.)
- Unallocated Space (Scanning free space only.)
- Specified Range (Scanning specified sectors.)
You could choose a partition block to scan the deleted or lost partition from the following disk map. You could also enter the starting LBA and Ending LBA directly.
4) Set the scanning method for the specified scanning range from the below.
- Quick Scan: It will quickly scan lost or deleted partitions from your hard disk. I will suggest you choose the full scanning option.
- Full Scan: It scans every sector of a specified scanning range. It may take a little time, but it’s good.
5) After scanning is completed you will show all lost/deleted partitions. Double-click the searched partition to show the content. Finally, select the partitions you want to recover from the following list and click .
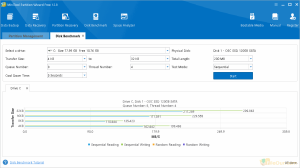
Disk Benchmark
- Select a drive which measures the data transfer speed.
- Now set the Transfer Size, Queue Number, Thread Number, Cool Down Time, Physical Disk, Total Length and Test Mode.
- Click to test the disk. So please wait some time.
- Finally, you will show the results of Sequential Reading, Sequential Writing, Random Reading and Random Writing performance.
Wizard
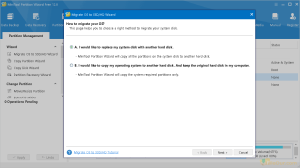
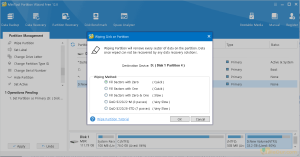
| Migrate OS to SSD/HD Wizard | It helps you to migrate your system disk. Here you will get two methods. So choose the right method as you need. A. It will copy all the partitions on the system disk to another hard disk. Choose a hard disk to migrate it and click . The OS will be migrated to the specified destination disk. Note that during migration, the content of the destination disk will deleted. |
|---|---|
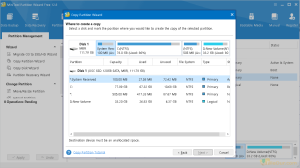
| Copy Partition Wizard | It helps to copy a specific partition to a different disk.
|
| Copy Disk Wizard | It helps to create a copy of your full hard disk on a different disk.
|
| Partition Recovery Wizard | I have already explained about the Partition Recovery feature. |
Change Partition
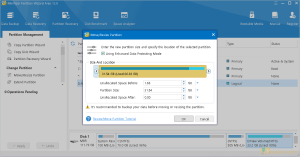
| Move/Resize Partition | It helps to create a new partition.
|
|---|---|
| Extend Partition | With this, you can extend the space of your current partition.
|
| Merge Partition | It helps to merge your NTFS partitions.
|
| Split Partition | Here you can divide the free disk space and create a new partition.
|
| Change Cluster Size | Sometimes cluster size can affect data read-write speed and even disk space. So you can change the cluster size in a simple way.
Note: Free version users cannot use this feature, must buy a Pro version. |
| Convert NTFS to FAT | It is an NTFS to FAT converter. It helps to convert file systems without any data loss.
Note: Only Pro version users can use the feature. |
| Set Partition as Primary | Go to Partition Wizard again. Basically it is not a feature. |
Partition Management
| Delete Partition | You can delete your unwanted partitions with a single click.
|
|---|---|
| Format Partition | The features help to clear targeted partition data.
|
| Copy Partition |
|
| Align Partition | The function helps to align the specified partition.
|
| Wipe Partition | With this function, you can remove the specified partition including complete data. But remember that once this data is removed, it cannot be recovered by any way or software.
|
| Set Label | You can change the label of the selected partition.
|
| Change Drive Letter | To change the current letter to a new drive letter. |
| Change Partition Type ID | To change the current partition type ID.
Note: Only Pro version users can use the feature. |
| Change Serial Number | It can change your partition serial number.
Note: Only Pro version users can use the feature. |
| Hide Partition | To hide the important partition from other users. It’s simple.
|
| Set Active | Suppose you have multiple operating systems on your PC. So this feature is for you. You can set the operating system you want to mark as the first boot.
|
Check Partition
| QExplore Partition | To observe every file inside a partition. View a list of file names, creation time, modified time and size. |
|---|---|
| Surface Test | Check the surface and see if there are any errors. |
| Partition Properties | To view all information about a partition. Usage: View used, unused and total partition size. Partition Info: View Partition Type ID, File System, Serial Number, First Physical Sector, Last Physical Sector and Total Physical Sector. File System Info: View Sectors per Cluster, Sectors per File Record, Sectors per Index Record, $MFT LCN and $MFTMirr LCN. |
| Data Recovery | Data Recovery is the most important feature of the software. I have already explained about it. |
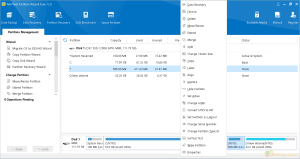
There is a last-moment option to confirm any work. I like it. Look at the bottom left panel. You will see your job is pending. If you want, you can go back to the previous place by clicking on the . There may be no going back, once the job is clicked by .
Technical Details
- Latest Version: 13.5
- License: Free
- Final Released: 09/12/2025
- Publisher: MiniTool® Solution Ltd
- Operating Systems: Windows 11, Windows 10, Windows 8, Windows 7, Windows XP
- System Type: 32-bit & 64-bit
- Setup File: pw-free-offline.exe
- Language: English, French (Français), German (Deutsch), Italian (Italiano), Spanish (Española), Japanese (日本語), Korean (한국어), Portuguese (Português)
- Category: Backup and Recovery
- Uploaded: Publisher


Leave a Reply